Pyramid allows you to upload or connect to JSON files and convert the data into a table. Each given JSON file is converted into a single table. The JSON file source supports local file upload, or pointer to a shared file on a network drive, or URL address.
Provide a JSON File Source
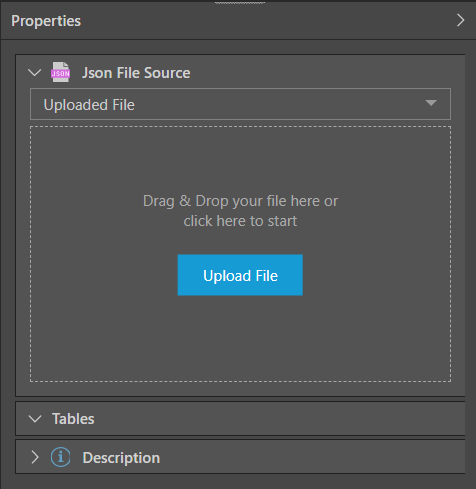
Start by adding the JSON source node and go to its Properties panel. Connect the required file by uploading it, or pasting a pointer to a shared file, or a URL address.
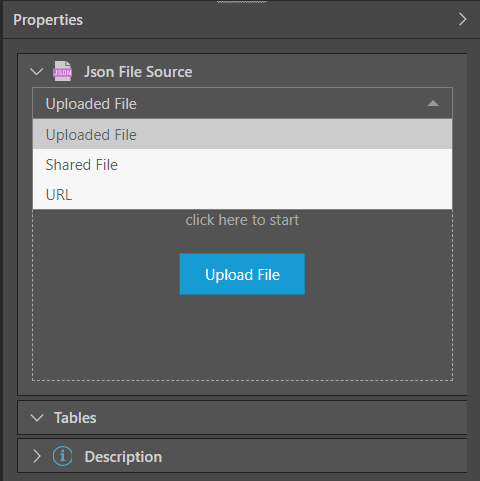
Uploaded File
Upload the file by dragging it from its folder location onto the upload widget. Alternatively, click Upload File to open your file explorer and find and select the file from its folder location.
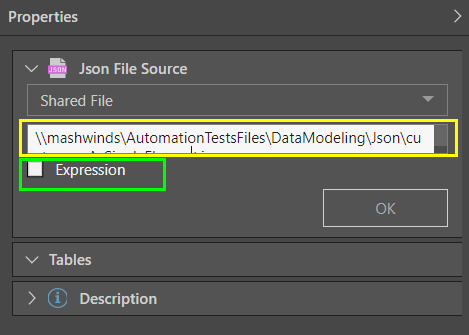
Shared File
Enter the file path of the shared file (including the file name and extension) in the File Path field (green highlight below). Enable 'Expression' (yellow highlight) to provide the file path in the context a dynamic PQL expression, created in the PQL Editor.
- Click here to learn more about connecting to a shared file.
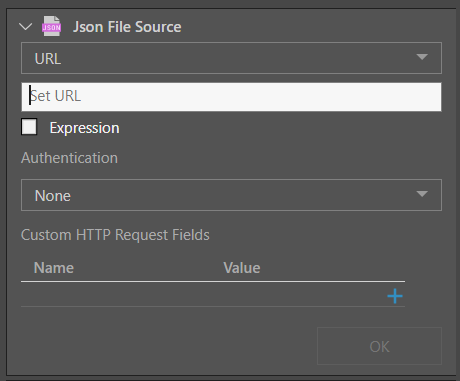
URL
The data will be downloaded from the URL when the model is processed.
To connect to an XML file via its URL, paste the URL in the Set URL field. Enable 'Expression' to provide the URL in the context a dynamic PQL expression, created in the PQL Editor.
Select the appropriate authentication type:
- None: Select None if no authorization is required.
- Basic Authentication: Select if basic authentication is required.
- Custom Header: Select if custom header authorization is required.
Configure a JSON File Source
Start by adding the JSON source node and go to its Properties panel. Connect the required file by uploading it, or pasting a pointer to a shared file, or a URL address. Once you've uploaded or connected to the file, you'll need to configure the properties to determine the structure of the table.
- Encoding: encoding is set to UTF-8 by default. If your JSON file source has a different encoding, select it from the dropdown list. If you don't know which encoding to choose, you can locate the JSON file's encoding set at the bottom right corner of the file itself.
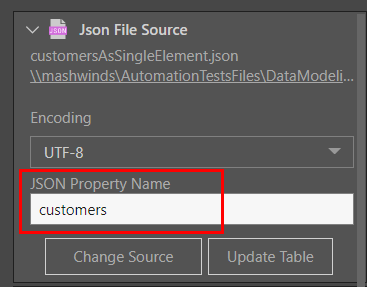
- JSON Property Name: provide the property name of the JSON file to ensure each element is organized into separate columns. If the property name is not provided, the ensure JSON string will appear in a single column and row.
- Change Source: upload or connect to a different JSON file.
- Update Table: update the resulting table with any changes made to the JSON properties. This option appears only after the table has been added to the data flow.
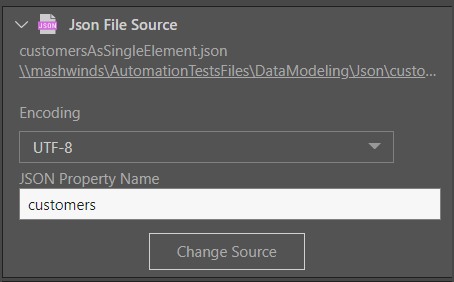
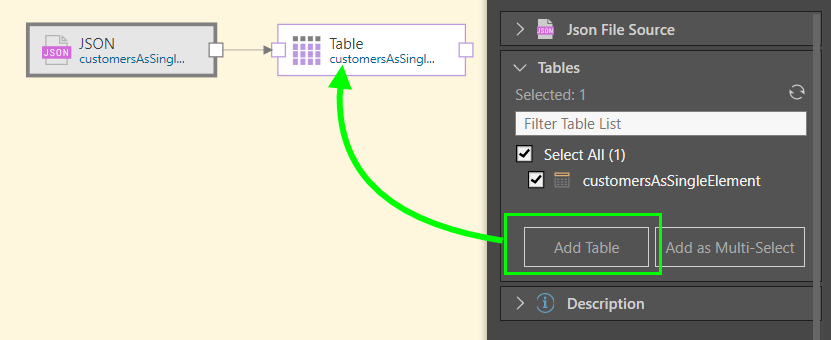
Table Selection
The JSON file will be converted into a single table; select the table and click the 'Add Table' button.

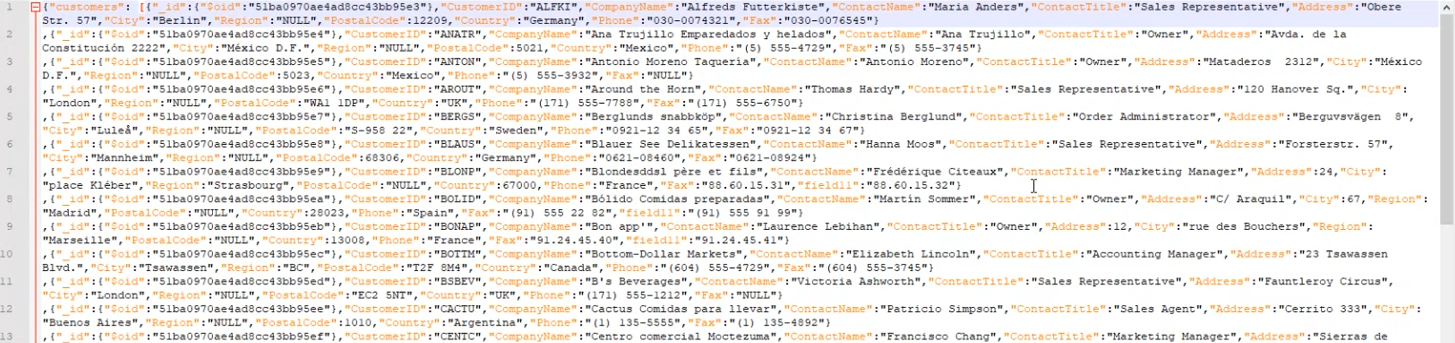
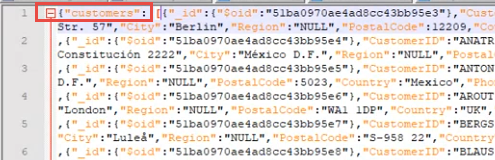
In this example, the user connected to the following shared JSON file, which contains custom data with field names like "CustomerID", "CompanyName", ContentName", "ContactTitle", and more.
The property name is "customers" (red highlight below):
Once the shared file path is provided, Pyramid connects to the file. Next, the appropriate encoding is set, and the JSON Property Name is entered (red highlight below):
Once the JSON file's properties are set, the file is added to the data flow using the Add Table function (green highlight below):
When the new table is previewed, we see that each JSON field name has been converted into a column name, with each column containing all the values for that field name:

To view more details on extracting JSON text click here.